

Entra IDP Integration
Step-by-step instructions for Entra ID Integration

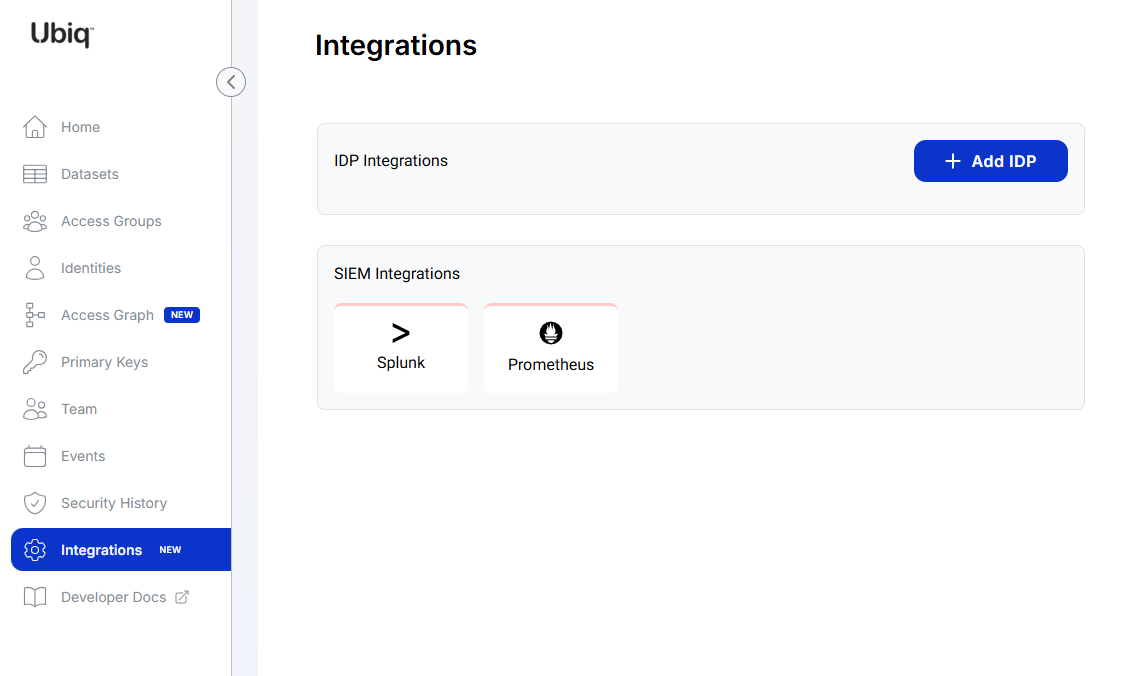
IDP Integration
IDP Integration setup UI is available on the Integrations page for all enterprise plan users.
Setting up the IDP integration has 2 parts:
- Configuration of a new SCIM integration that synchronizes users and groups from your Entra to Ubiq
- Configuration of a new Entra application that allows Ubiq to verify and work with your Entra tokens
REQUIREMENTYou MUST have the requisite Microsoft license which allows for group provisioning via SCIM. Please confirm the specific license directly with Microsoft.
Ubiq IDP Integration Setup
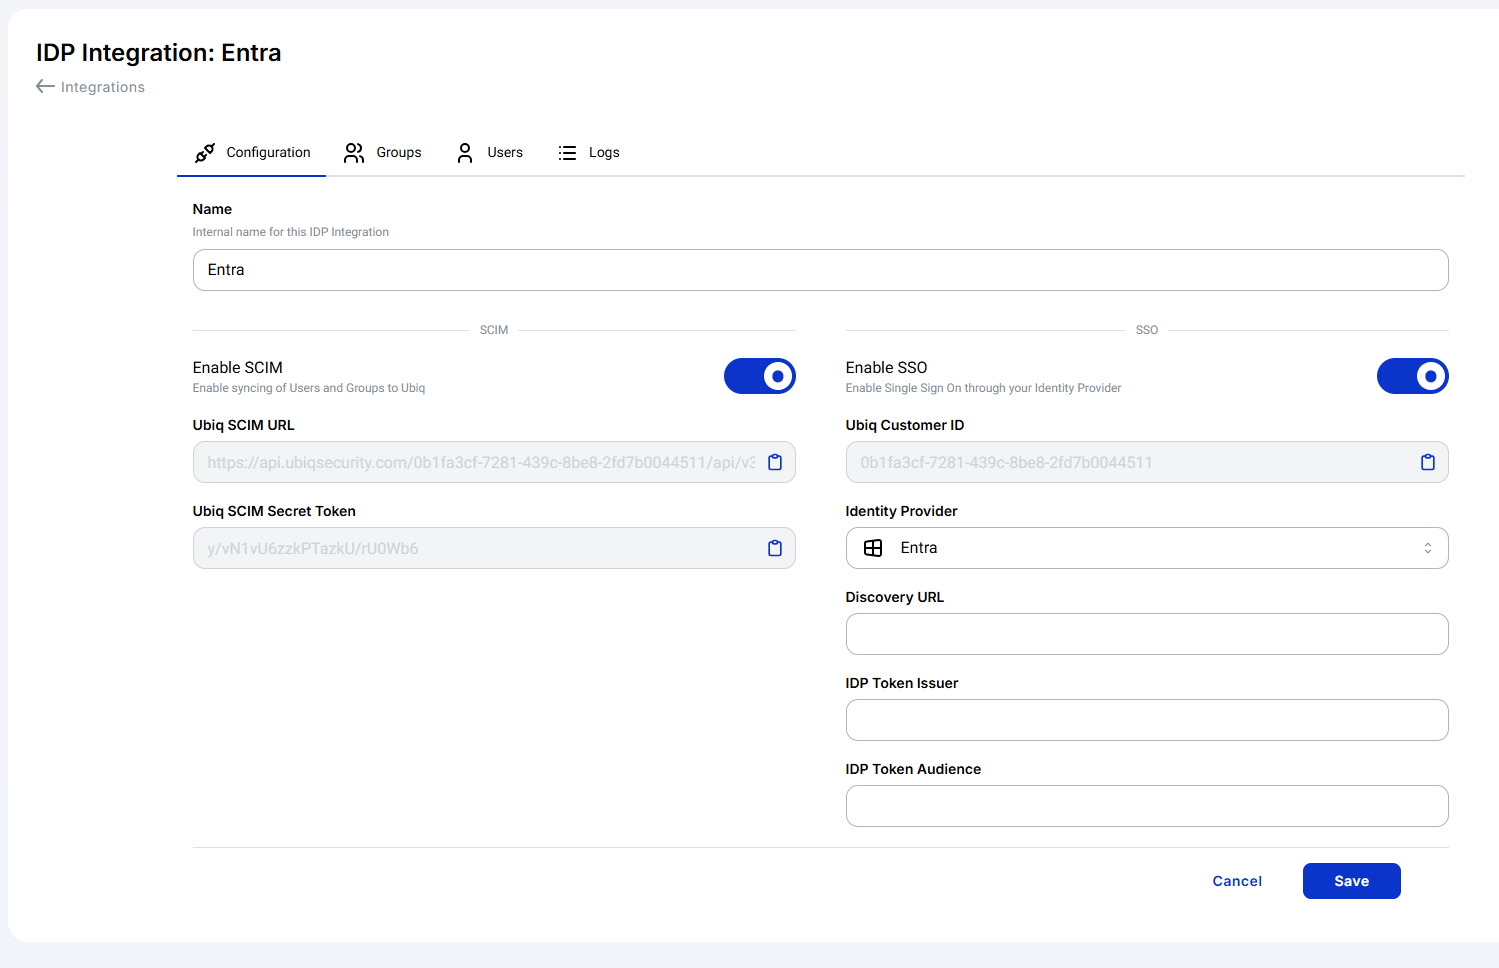
When enabling IDP Integration the following settings will need to be populated from values in Microsoft Entra ID
IMPORTANTFor SCIM provisioning, start from Enterprise Applications, not App registrations.
App registrations are used later for token/JWT configuration.
Azure AD / Entra Integration
Create Enterprise Application
- Microsoft Entra ID Dashboard → “+ Add” → Enterprise Application
- Click “+ Create Your Own Application”
- Enter desired name of the Application
- Select “Integrate any other application you don’t find in the gallery (Non-gallery)
- Click Create
Users / Groups
- Users & Groups → “+ Add user/group”
- Select the users or groups that should be synchronized into Ubiq for identity-based dataset authorization.
- Click Assign
Provisioning
- Provisioning → Provisioning
- Change Provisioning Mode to Automatic
- Set Admin Credentials -> Tenant URL
- Use the Ubiq SCIM URL from Ubiq IDP Integration screen and append ?aadOptscim062020
- The final Tenant URL should look like: https://api.ubiqsecurity.com/{{GUID}}/api/v3/scim/?aadOptscim062020
- Set Admin Credentials → Secret Token = Ubiq SCIM Secret Token from Ubiq IDP Integration screen
- Click Test Connection
- Click Save
Before testing JWT authorization from an application
Before testing JWT-based protect/unprotect calls from an application, confirm the following:
- Entra is configured as the IDP in the Ubiq dashboard.
- SCIM provisioning from Entra to Ubiq is enabled and has successfully run.
- The test users exist as Identities in Ubiq.
- The relevant Entra groups exist and are assigned to the Enterprise Application.
- Matching Ubiq Access Groups exist with the exact same names as the Entra groups.
- The appropriate datasets are assigned to the Ubiq Access Groups.
- The application can obtain a valid Entra JWT for the test user.
If users or groups have not been provisioned into Ubiq, Ubiq may be able to validate the JWT but will not have the corresponding identity or access group membership needed to authorize dataset access.
Configure Application
- Microsoft Entra ID Dashboard → App registrations → All Applications → Your Application
Enable Access Tokens
- Authentication → Check “Access tokens (used for implicit flows)” → Save
Client Secret
- Certificates & secrets → Client Secrets → “+ New client secret”
- Enter description of client secret (e.g. Ubiq Secret) and desired expiration
- Click Add
- Copy new secret value and store somewhere safe, will be used later by client library
Token Claims
- Token configuration → “Add groups claim”
- Select desired group types, likely the “Groups assigned to the application” option
- Click Add
API Scopes
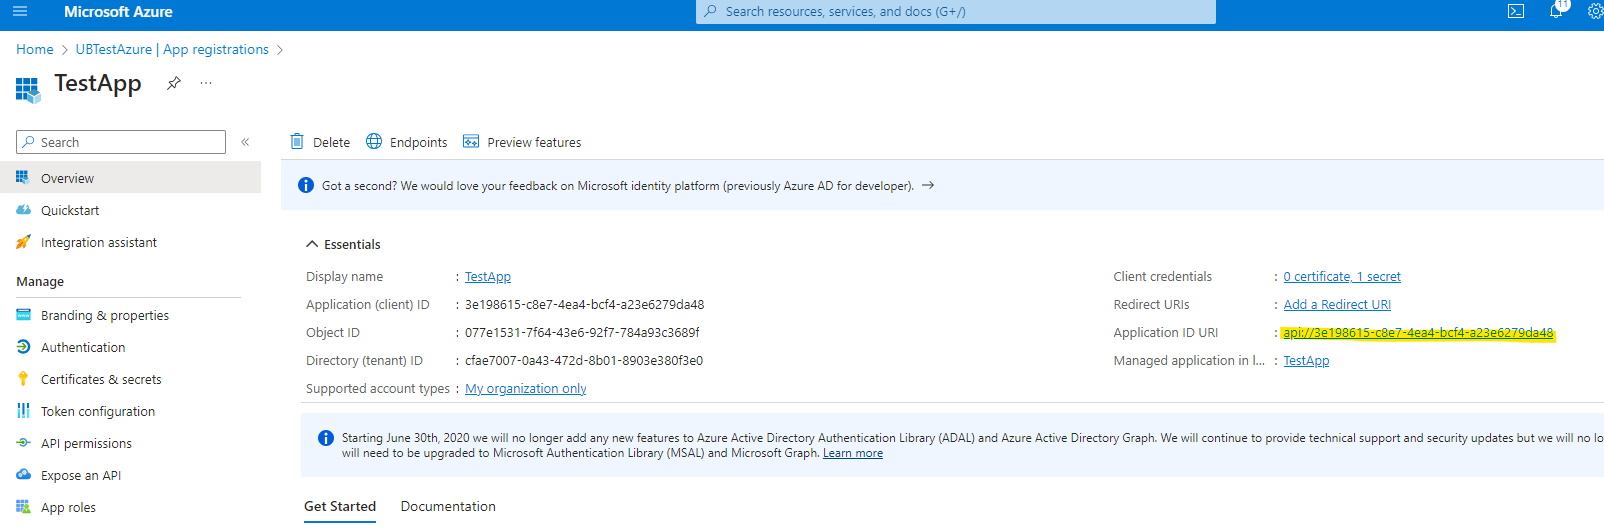
- Expose an API → “Add” Application ID URI
- Click Save
- Click “+ Add a scope”
- Scope name => Custom.Read
- Who can consent? => Admins Only
- Enter desired display names/descriptions
- Click Add scope
API Permissions
- API permissions → “+ Add a permission” → “APIs my organization uses”
- Select your application name
- Select Custom.Read permission
- Click “Add permissions”
- “+ Add a permission” → Microsoft Graph
- Click delegated permissions
- Select offline_access, openid, and profile permissions
- Click “Add permissions”
- Click “Grant admin consent for YourAzureADTenantName”
- Click Yes to confirm
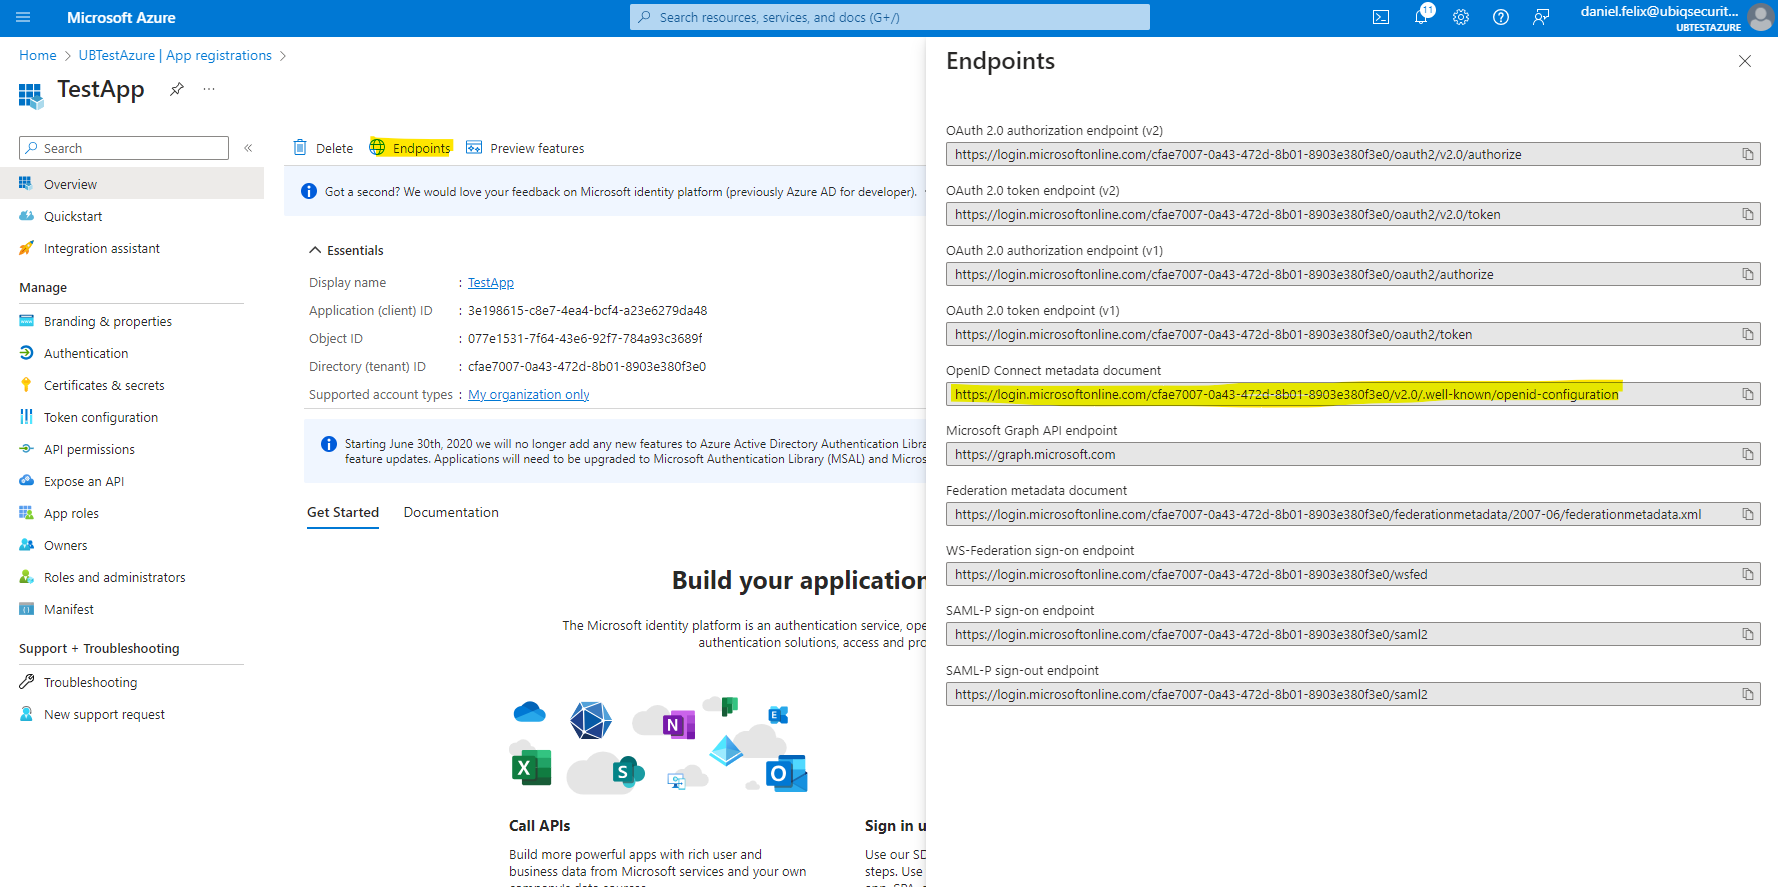
OpenID Connect Discovery URL
Microsoft Entra ID Dashboard → App registrations → All Applications → Your Application → Endpoints → OpenID Connect metadata document
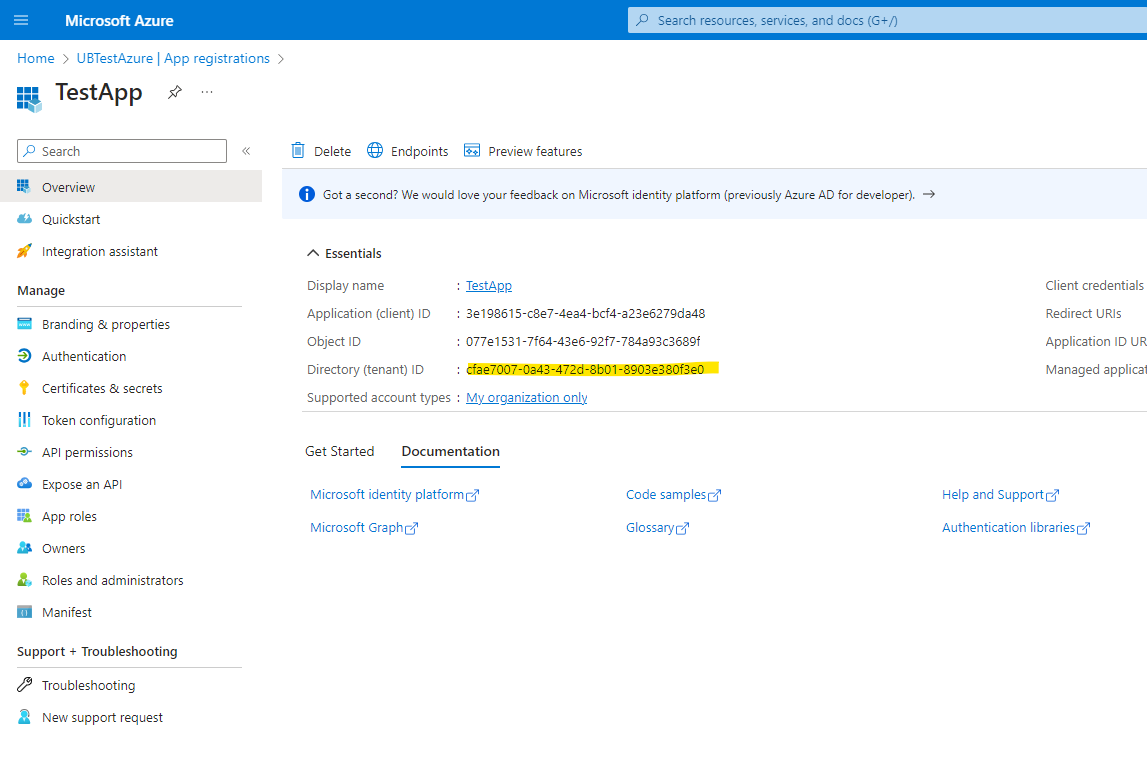
IDP Token Issuer
Value is https://sts.windows.net/TENANT_ID/ and your TENANT_ID can be found at Microsoft Entra ID Dashboard → App registrations → All Applications → Your Application → Directory (tenant) ID
IDP Token Audience
Microsoft Entra ID Dashboard → App registrations → All Applications → Your Application → Application ID URI
Updated 16 days ago