

Okta IDP Integration
Step-by-step instructions for Okta (IDP) Integration

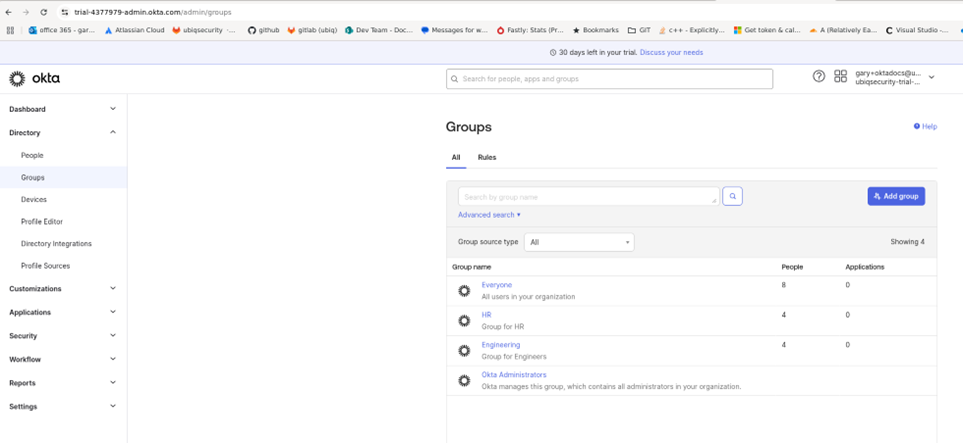
IDP Integration
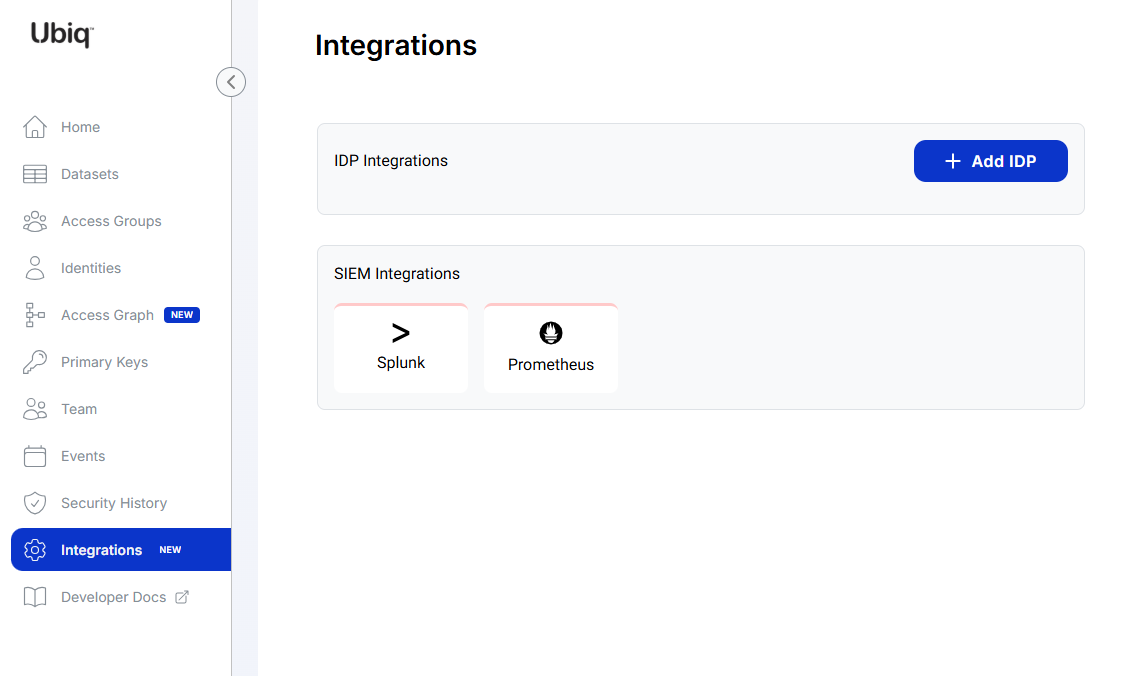
IDP Integration setup UI is available on the Integrations page for all enterprise plan users.
Setting up the IDP integration has 2 parts:
- Configuration of a new SCIM integration that synchronizes users and groups from your Okta to Ubiq
- Configuration of a new Okta OIDC application that allows Ubiq to verify and work with your Okta tokens
SCIM Setup
- Within Okta, you will need to create the users and groups that match the desired organizational structured.
- Within Ubiq, you will need to create Access Groups that correspond to the organizational names within Okta.
- Within Ubiq, you will also need to create Datasets and assign them to the Access Groups indicating authorized access between the users of the group and the corresponding datasets.
- Once the data in the respective systems has been created, you will need to setup the SCIM integration within Okta to sync the data to Ubiq. You will also need to setup the IDP information within Ubiq in order to authenticate users within Okta.
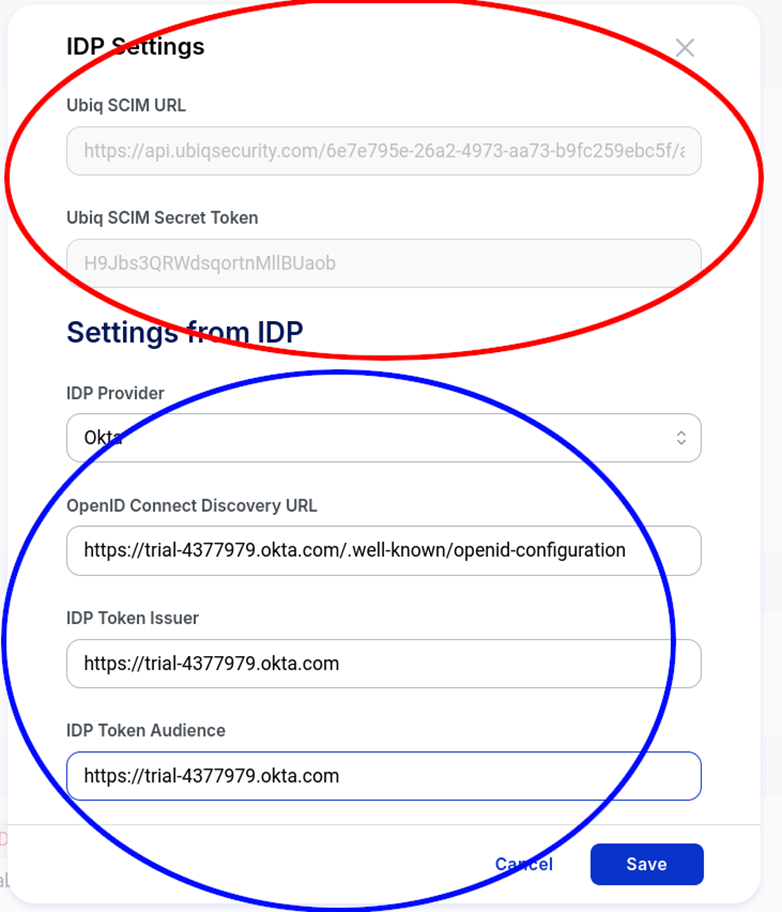
- You will need to capture the Okta account URL which needs to be entered into Ubiq and you will need the Ubiq SCIM URL and Ubiq SCIM Secret Token which can found in the Ubiq IDP Settings window.
Step by Step Instructions for SCIM
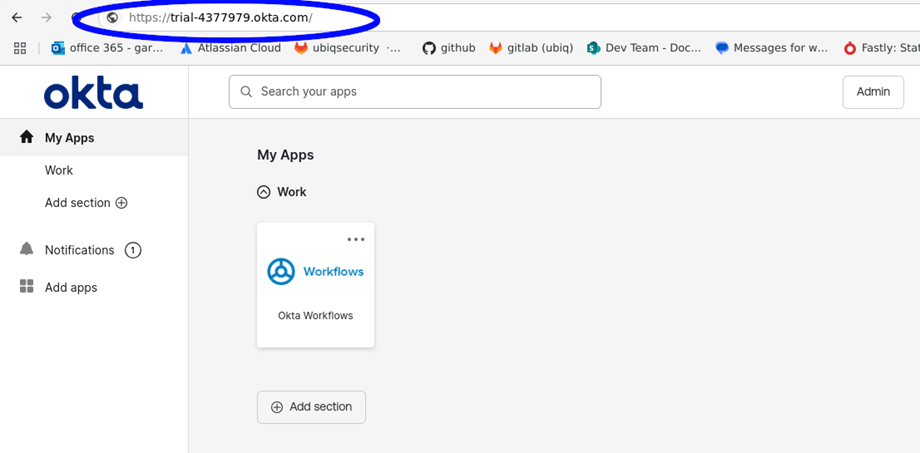
In this example the Okta account URL is https://trial-4377979.okta.com and can be found in the Okta main window as shown below circled in blue
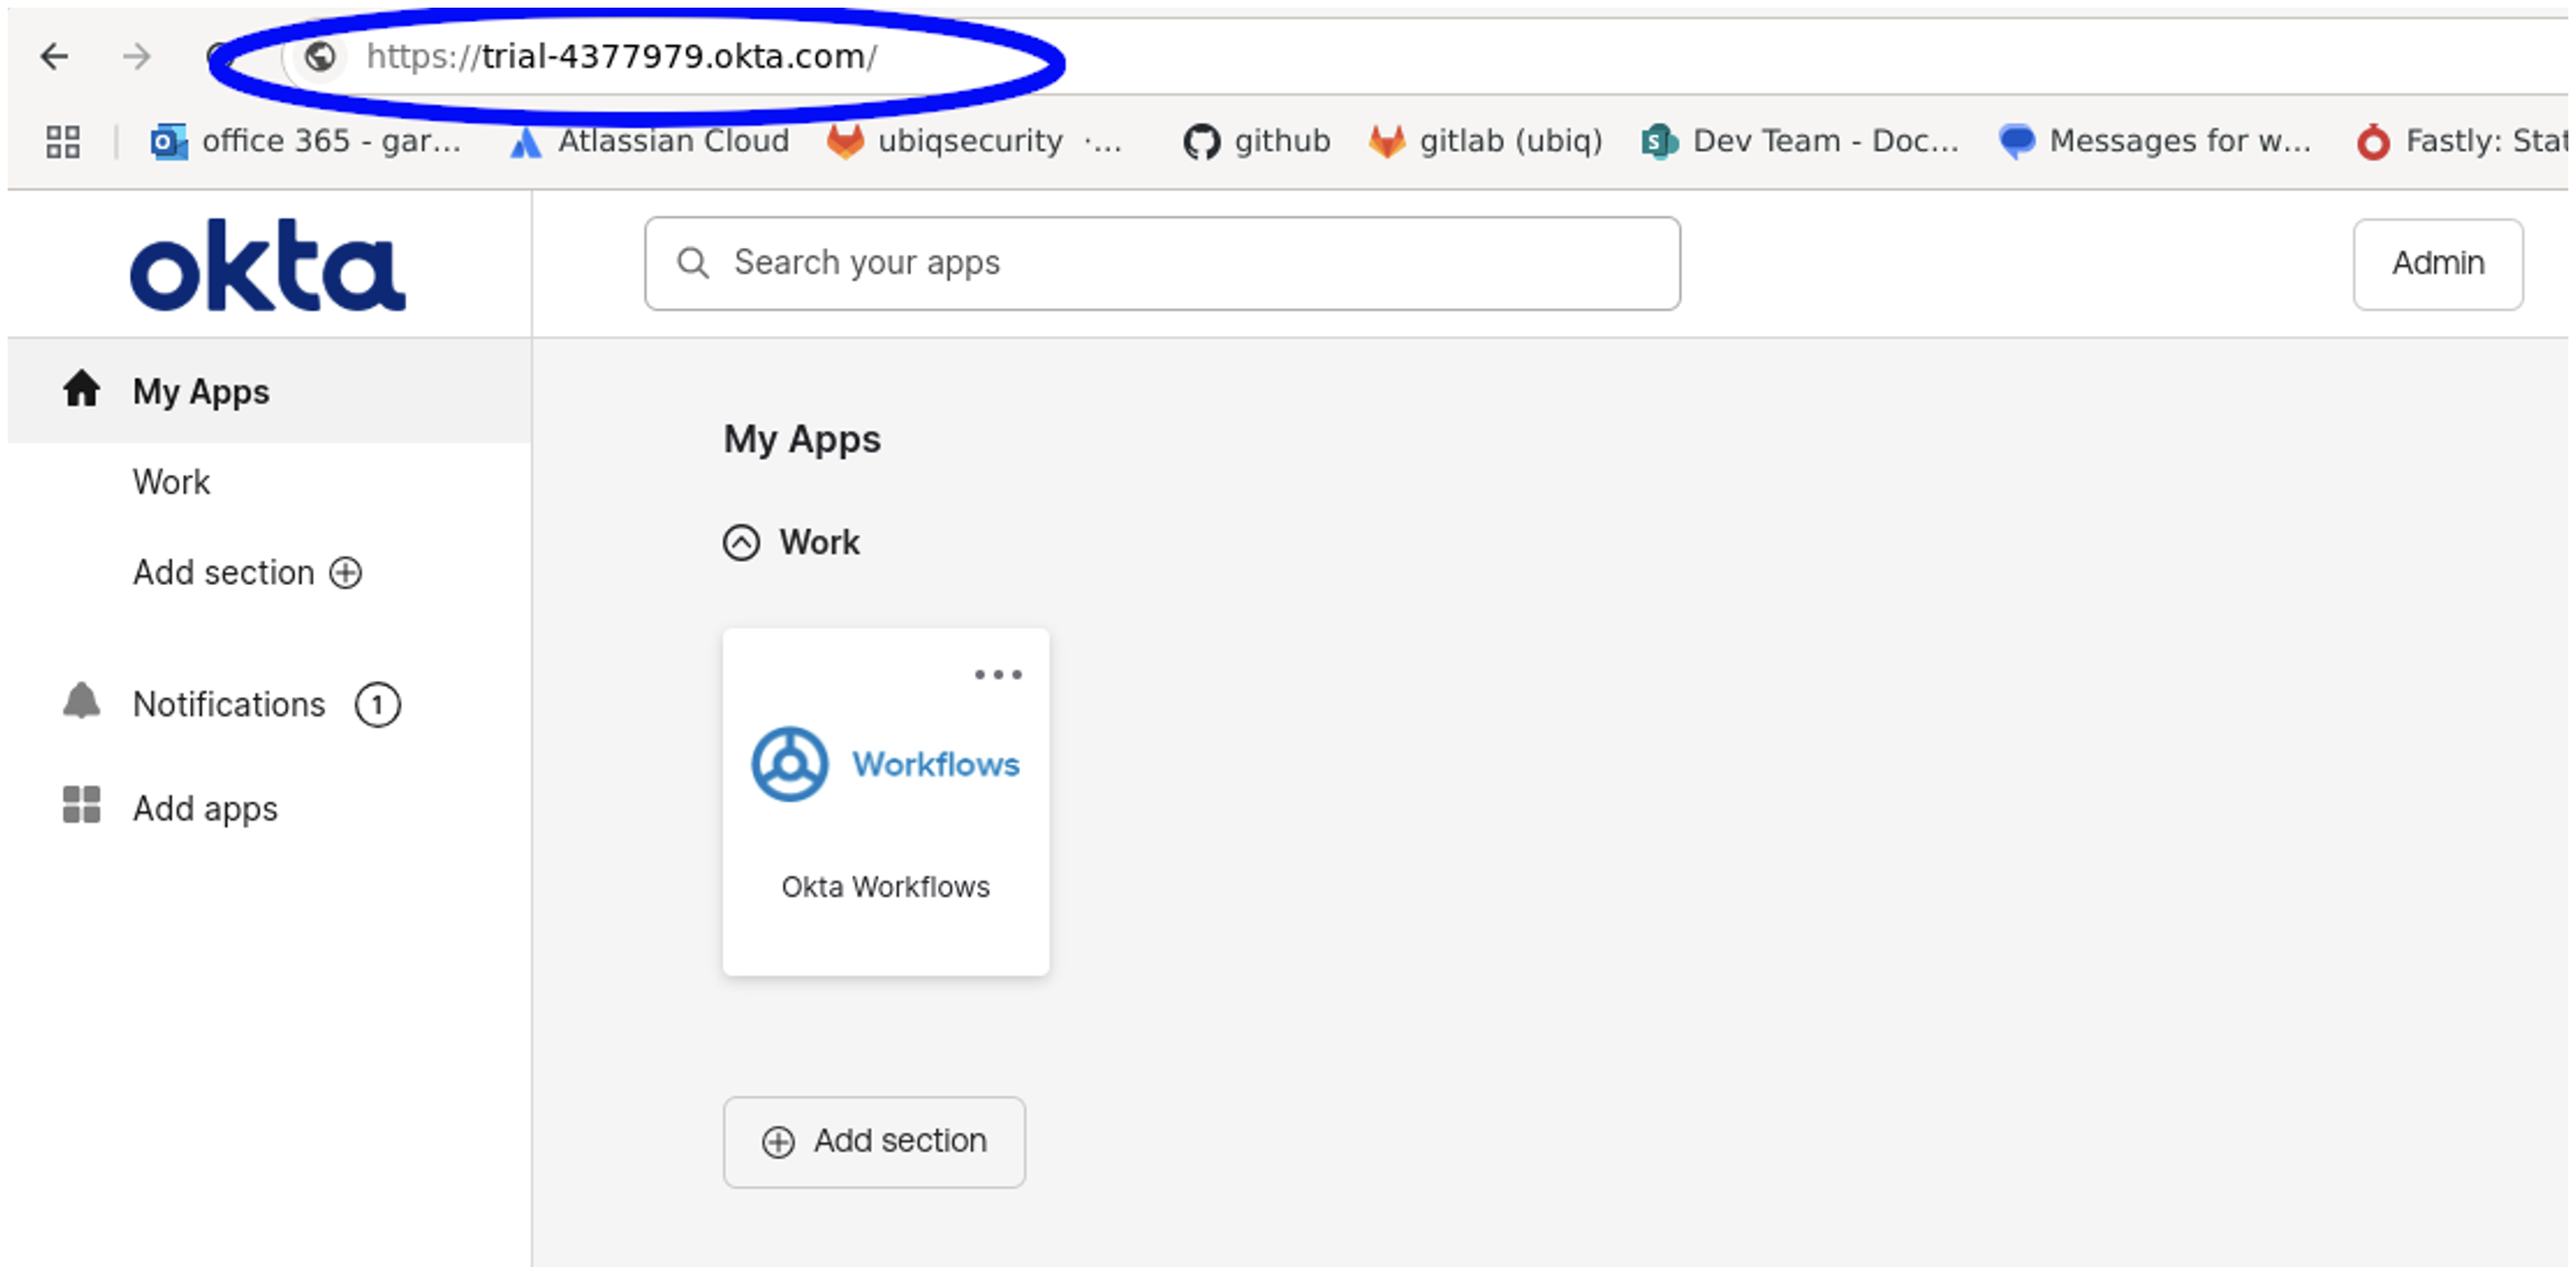
Figure 1: Okta Main Window
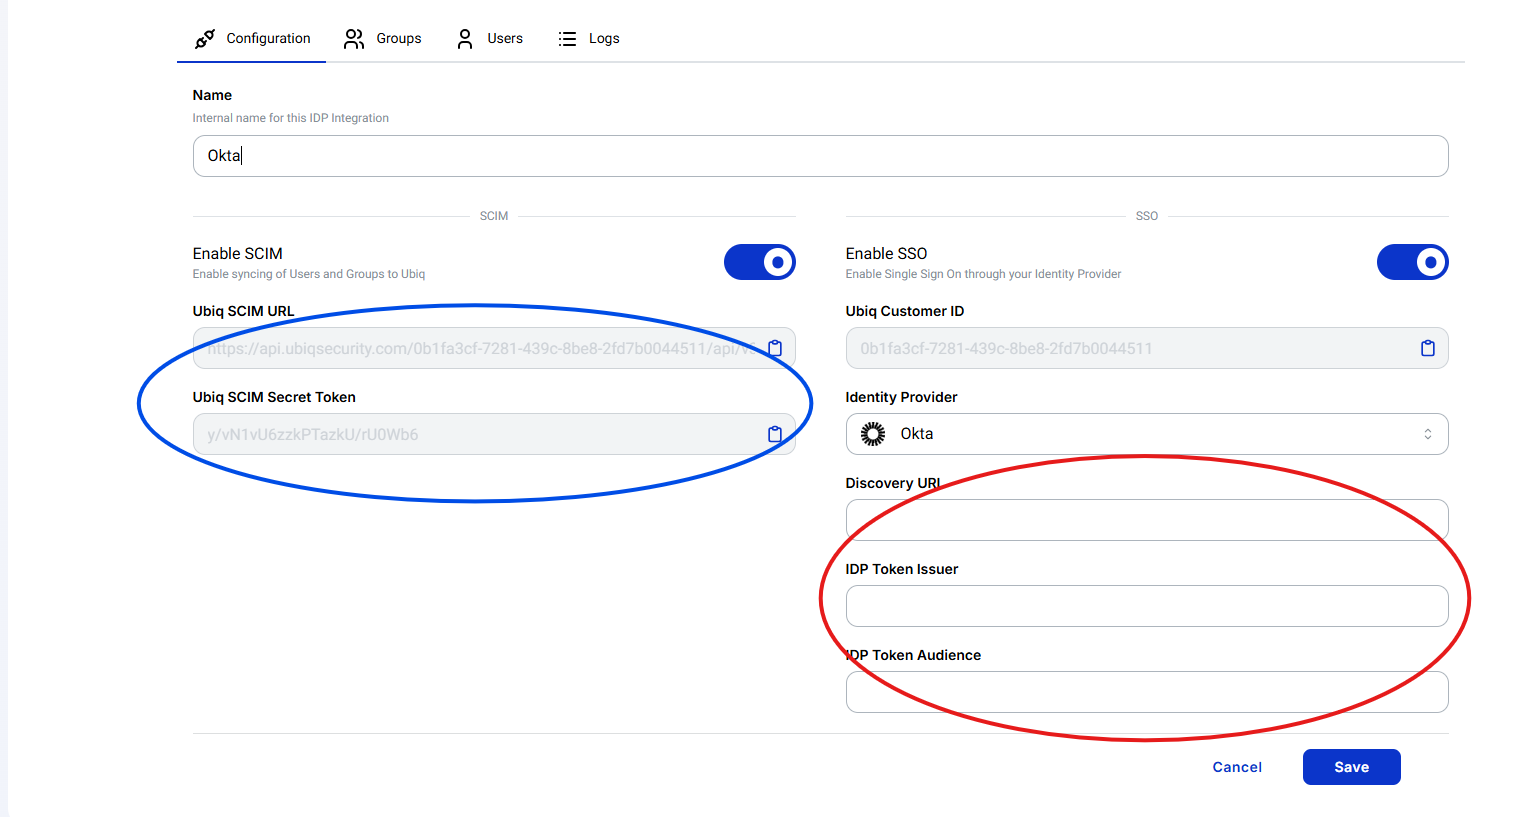
SCIM Parameters from Ubiq
The SCIM URL and Secret Token in Ubiq are found in the IDP Settings on the Integrations page. The area circled in red indicates the values that need to be entered into Okta. The area circled in blue are the account values from Okta.
Okta Configuration
To set up the SCIM push from Okta to Ubiq, you will need to create a SCIM 2 application within the Okta account, provision the application, and then add the users / groups to the application. The Users will automatically be pushed across but the groups need to be manually pushed.
Okta Users and Groups (see examples below) will be auto-provisioned in Ubiq via SCIM.
Okta SCIM Application
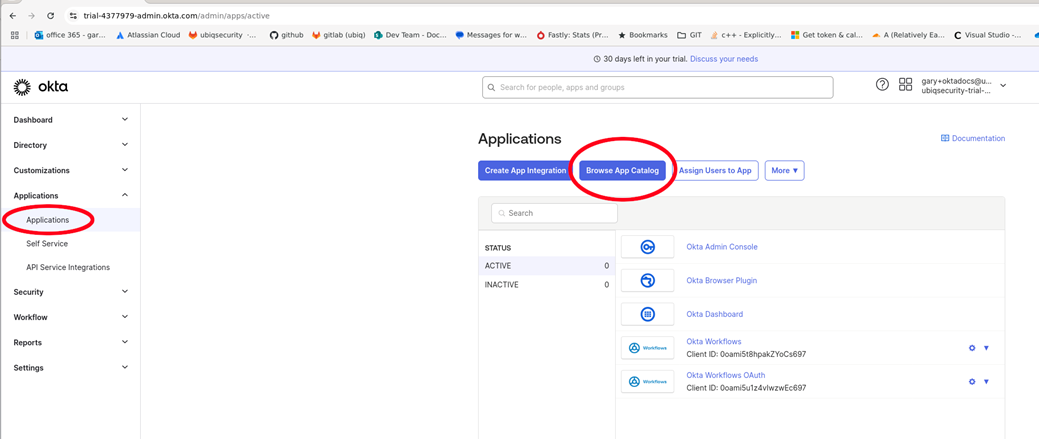
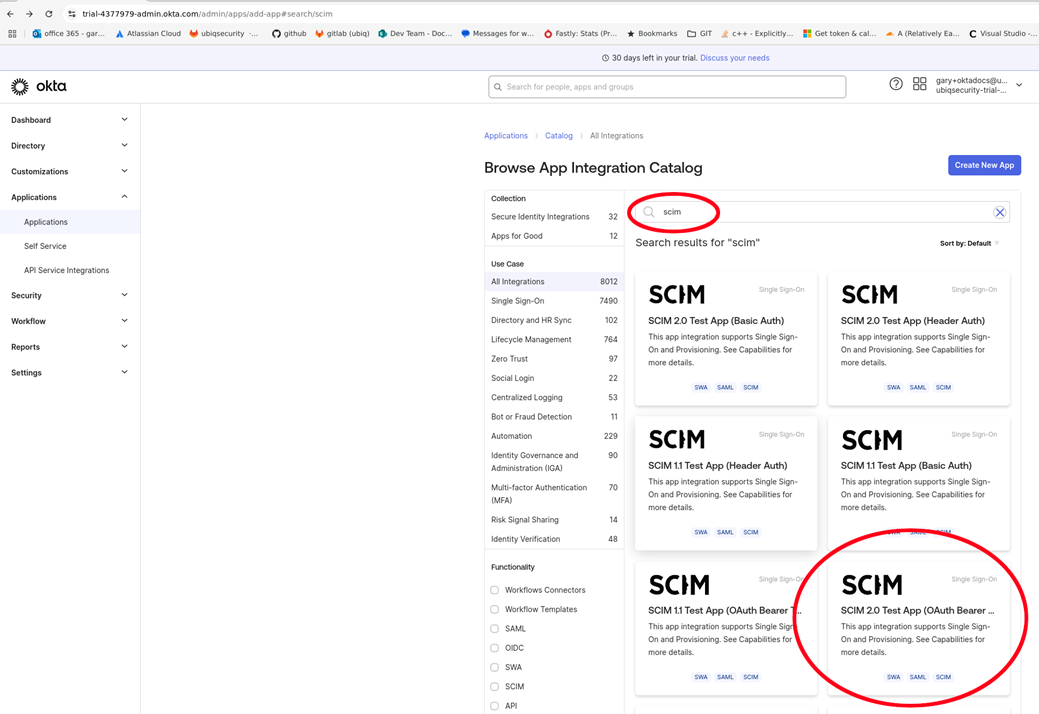
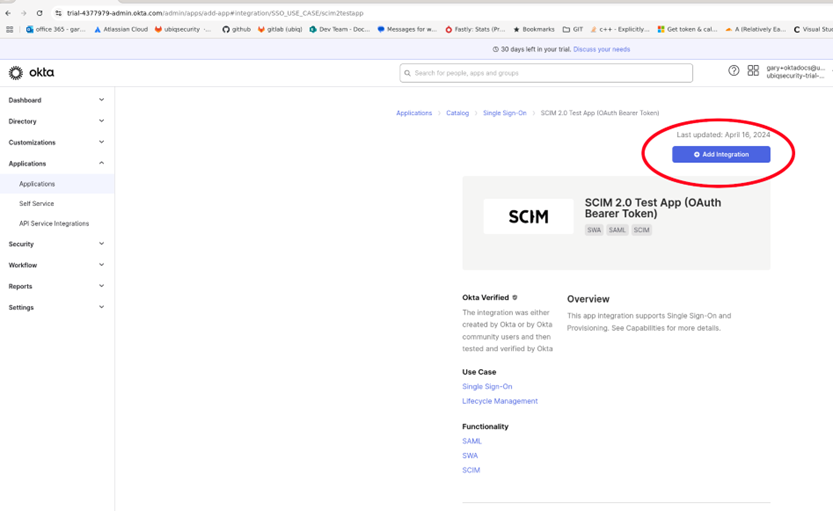
These steps should be followed to create a SCIM 2.0 application in Okta, which will sync Users and Groups to Ubiq:
-
Click on the Applications → Applications tab → Browse App Catalog button
-
Enter SCIM in the search and select SCIM 2.0 Test App (OAuth Bearer Token)
-
Click Add Integration
-
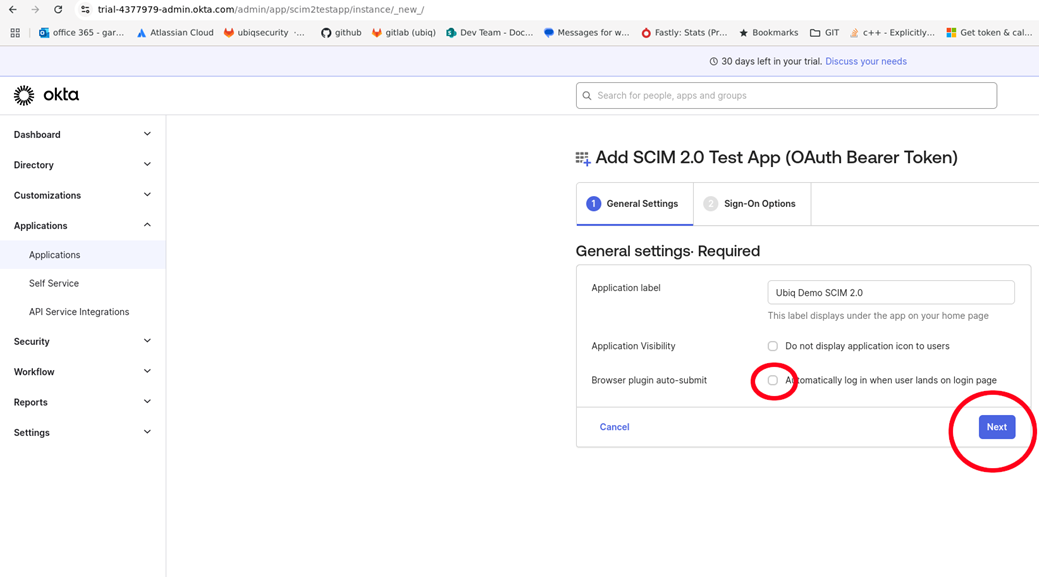
Since this is only for SCIM integration, uncheck the Browser plugin auto-submit checkbox
-
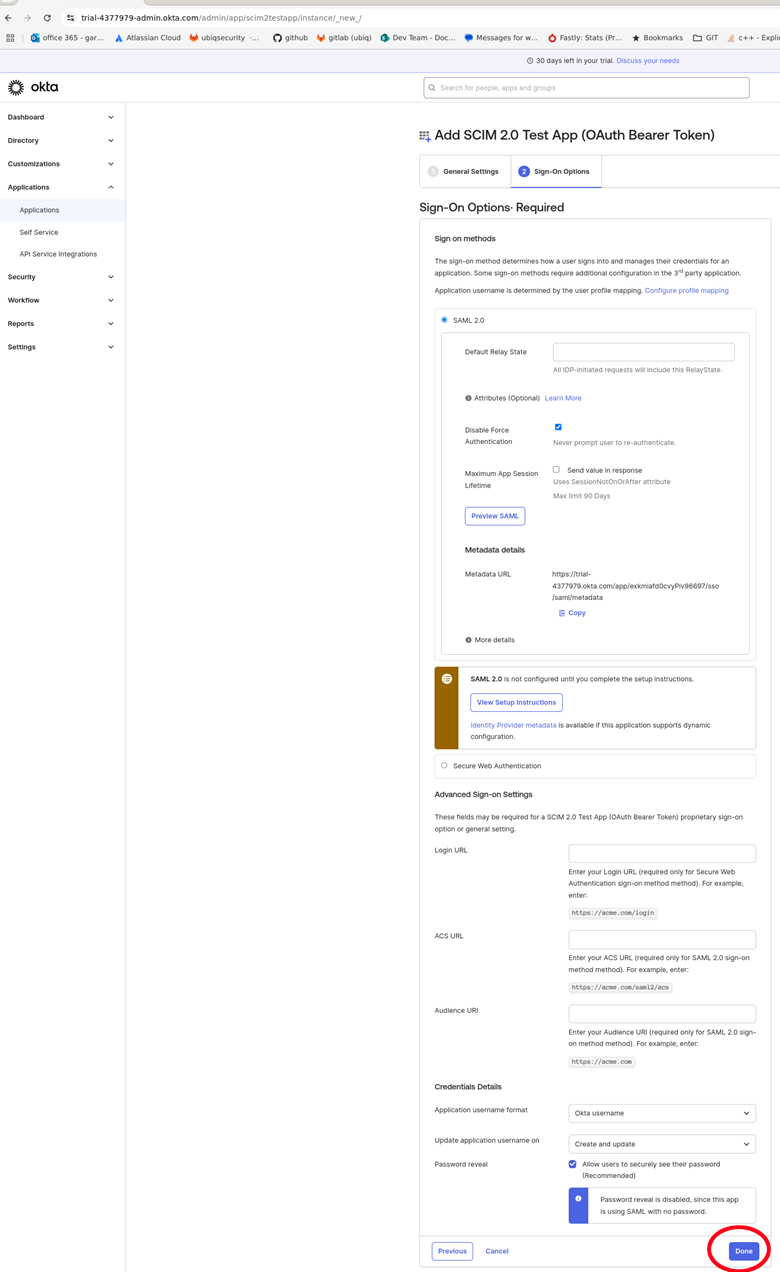
Click Done on the Sign-On Options
-
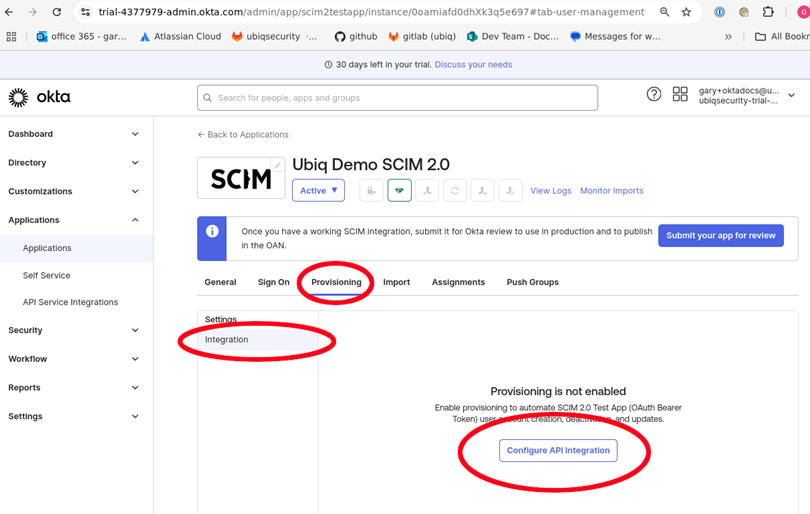
Click on Provisioning tab and Configure API Integration
-
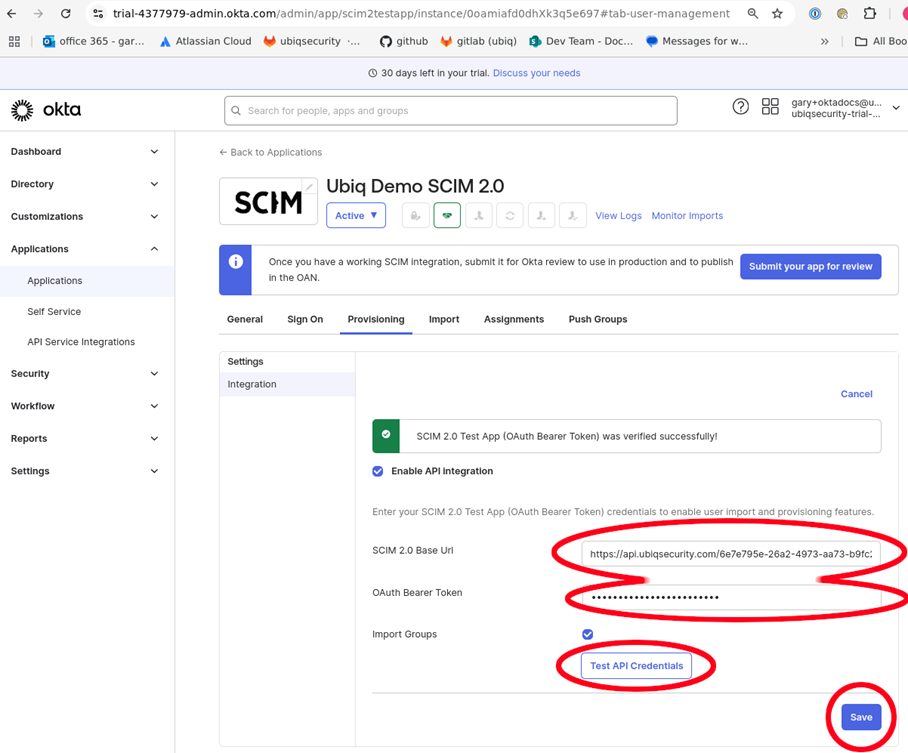
Enter the Ubiq SCIM URL and Ubiq SCIM Secret Token from the Ubiq IDP Settings window from the first part of this document "SCIM Parameters fro mUbiq" into the SCIM 2.0 Base Uri and Oauth Bearer Token fields. Click Test API Credentials to verify the setup and connectivity to Ubiq's SCIM endpoints.
-
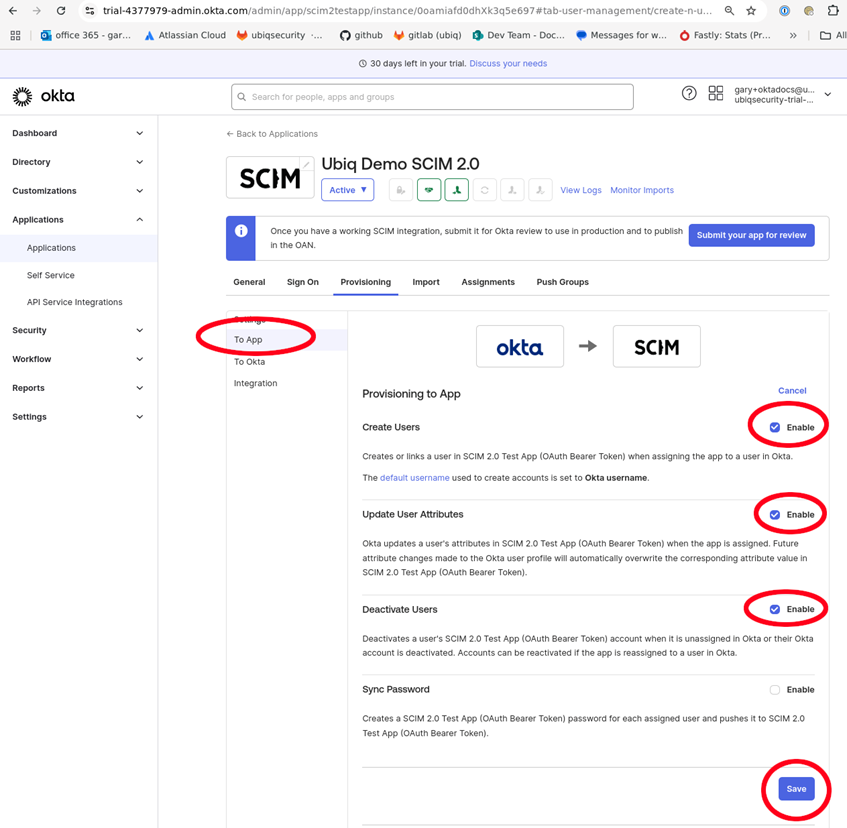
In the To App tab, click Edit for Provisioning to App in order to enable the appropriate SCIM activities
-
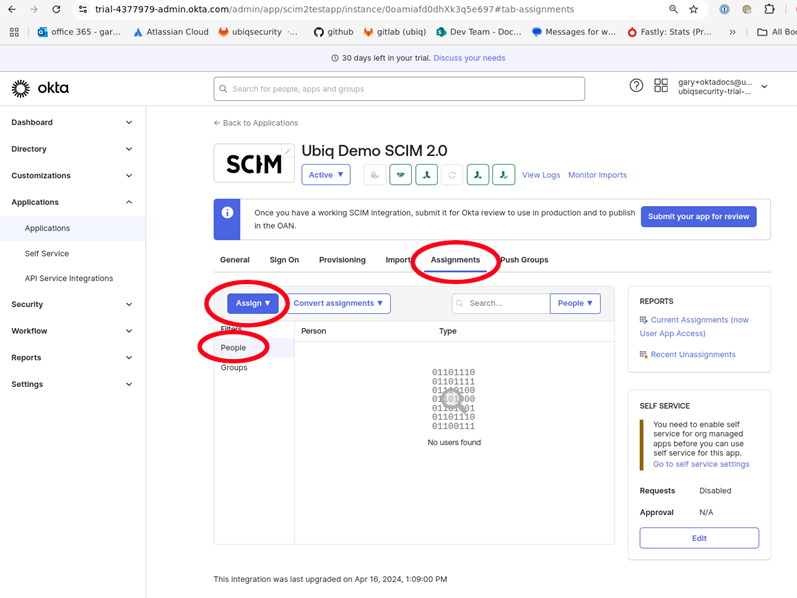
Click Assignments to associate People and Groups with the Applications. People will immediately sync to the Ubiq platform
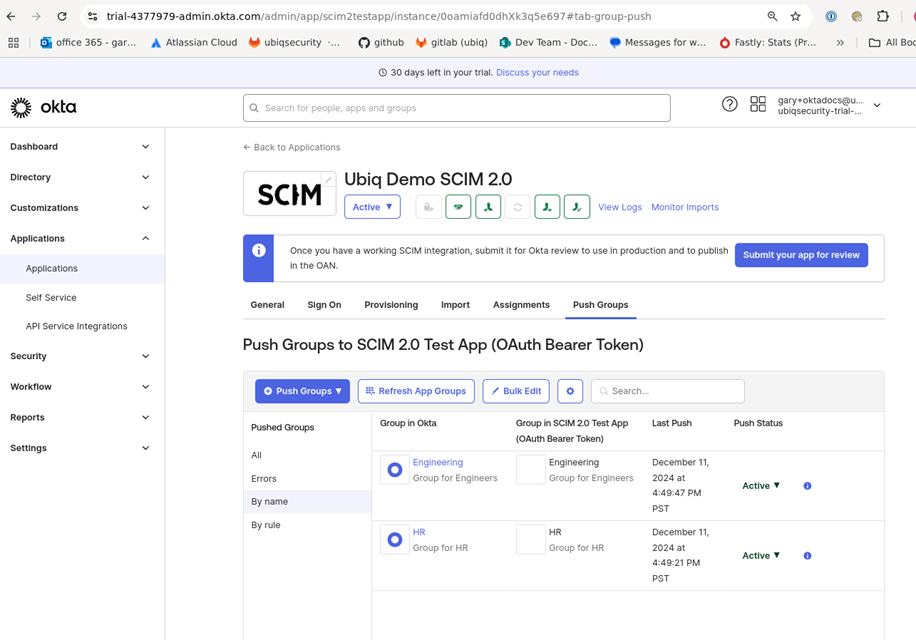
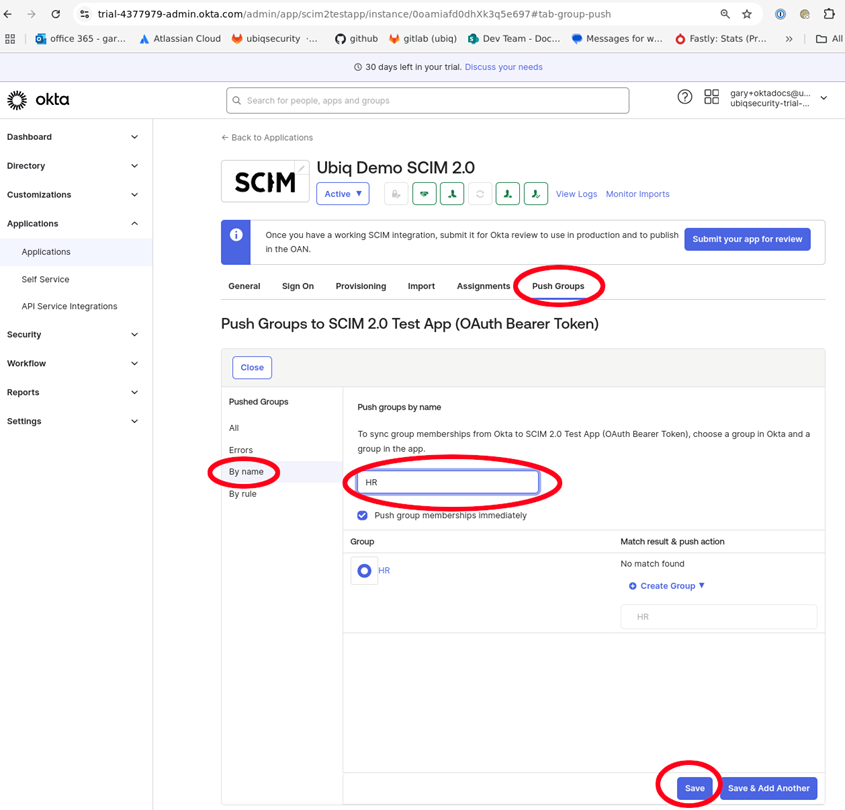
-
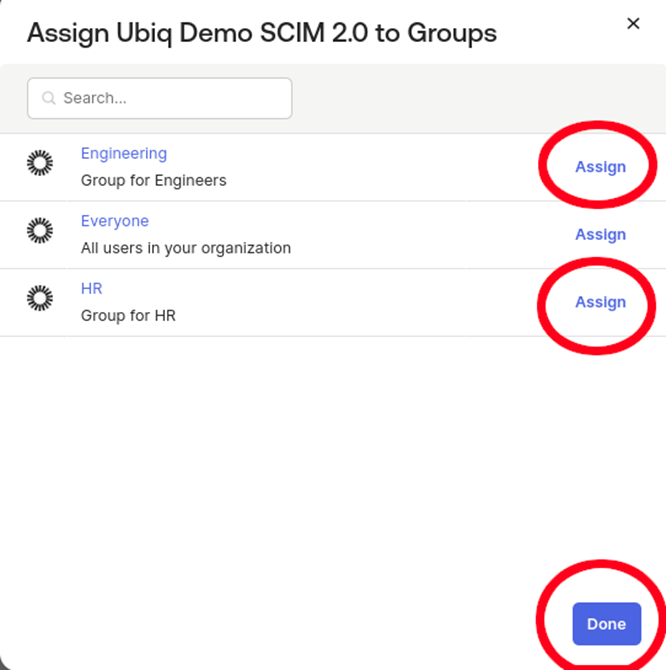
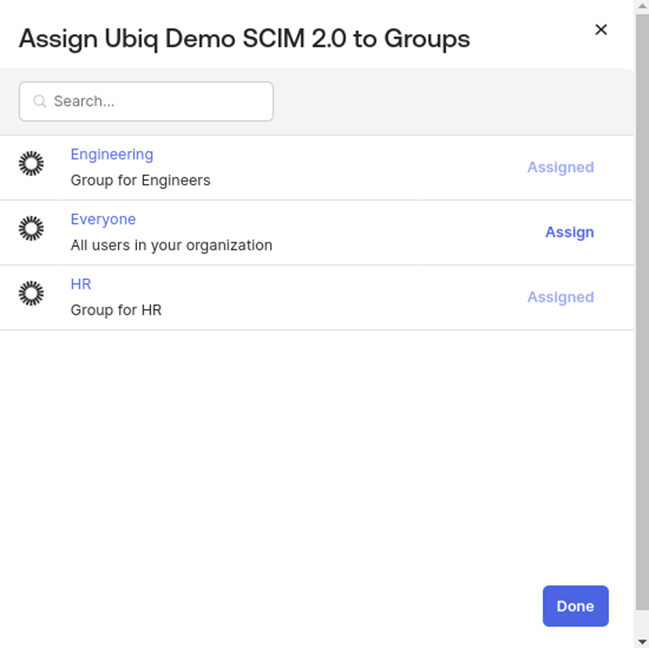
Groups need to be manually pushed using the Push Groups tab (Figure 18)
-
Click By name and enter and select the desired groups. Click save the list of pushed groups will be confirmed
-
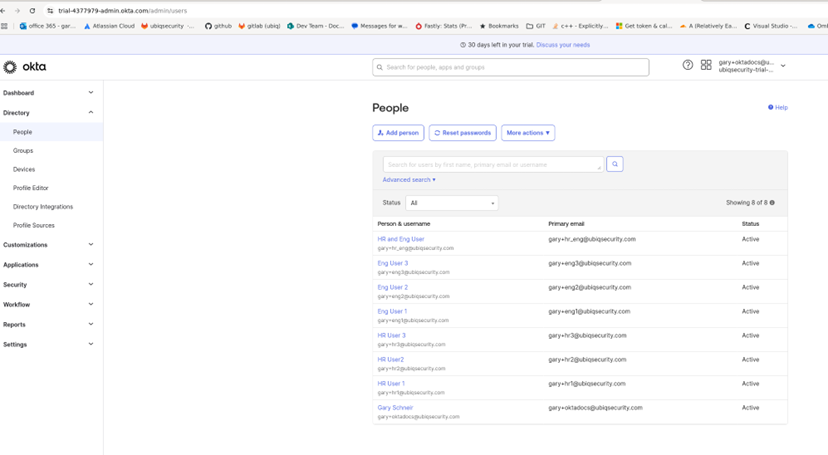
You can verify that Users are pushed to Ubiq by viewing the auto-provisioned Identities in the Ubiq API Identities tab. Permissions for the autoprovisioned Identities will match the User / Group membership in Okta.
OIDC Application Setup (use Okta auth in a Ubiq SDK/library)
Setup for Okta OIDC Applications
- Using the Okta IDP from Ubiq requires prior setup and synchronization using the SCIM integration. This document assumes the SCIM Integration with Ubiq has been successfully accomplished and synchronization steps have been successful.
- Within Okta, you will need to create a Native Application with OpenID Connect sign-in method.
- Within the Ubiq dashboard, you will need to enter the OpenID Connect Discovery URL, the IDP Token Issuer, and the IDP Token Audience with the values from the Okta account in the IDP Settings window
- For the Ubiq client libraries, you will also need to set the Okta IDP parameters of the configuration file to use the ClientID, Client Secret, Okta URL and the Ubiq customer id.
- Within the Ubiq client libraries the Okta user and password will be used in the credentials object to identify the Okta user
Step by Step Instructions for Okta OIDC Application
In this example the Okta account URL is https://trial-4377979.okta.com and can be found in the Okta main window as shown below circled in blue
-
Create a Native Application using OpenID Connect Sign-in method


-
Configure properties for the OIDC application
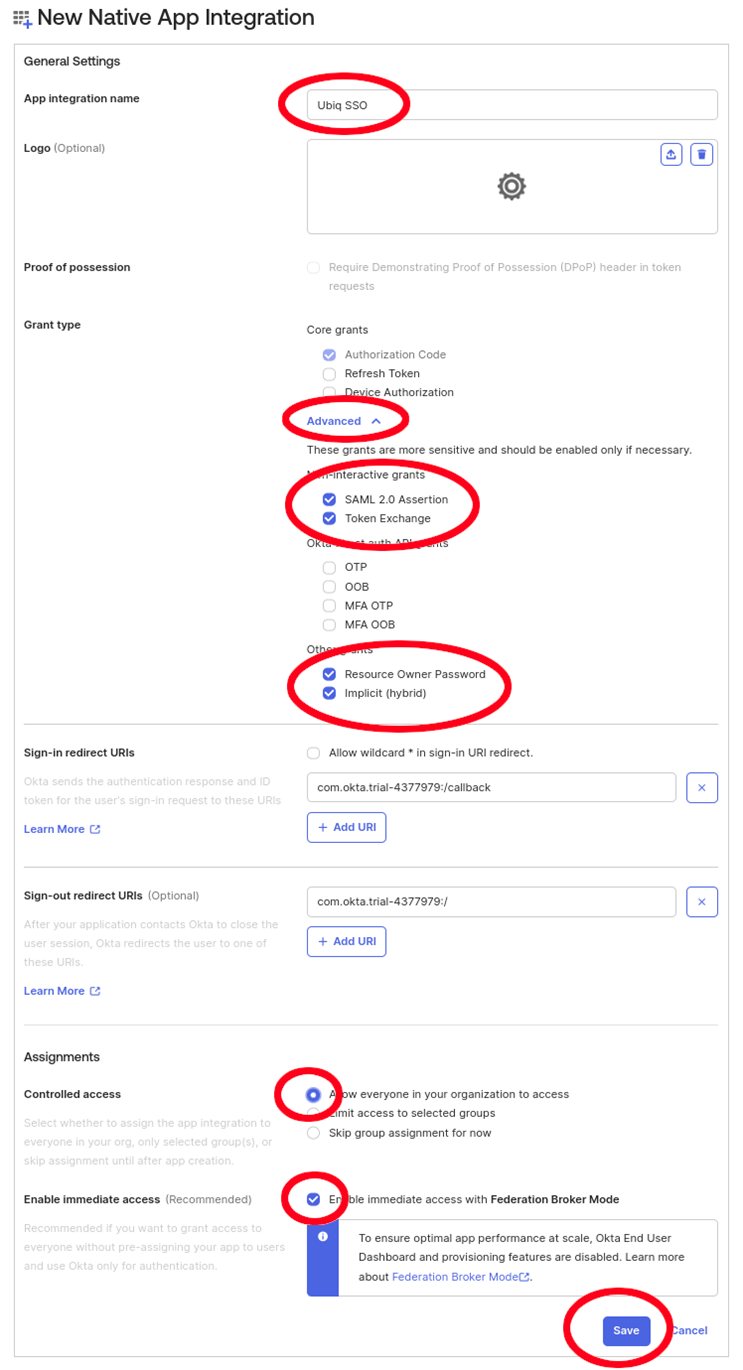
-
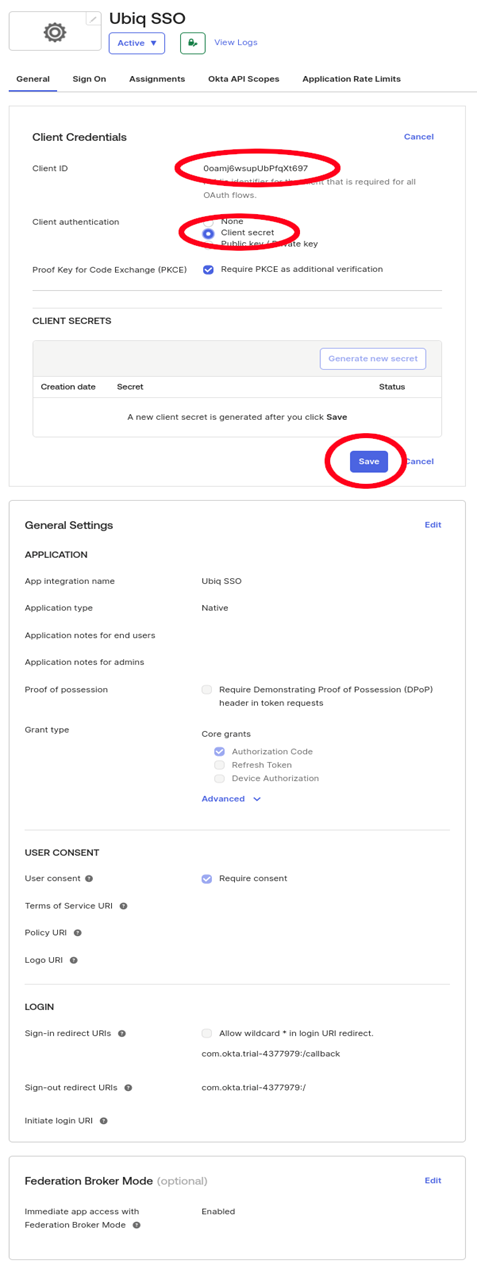
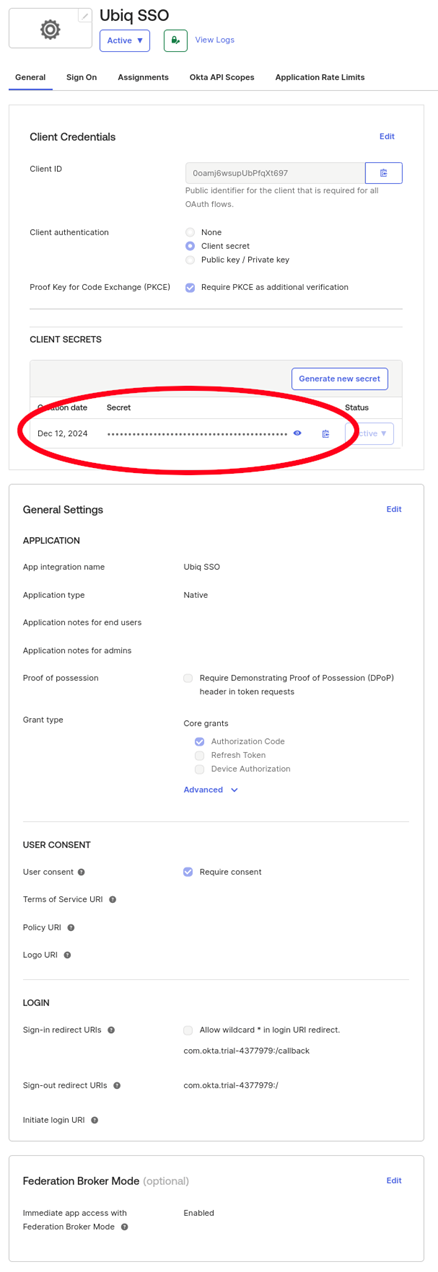
Get the Client ID and Client Secret for the application which will be used in the Ubiq configuration file
-
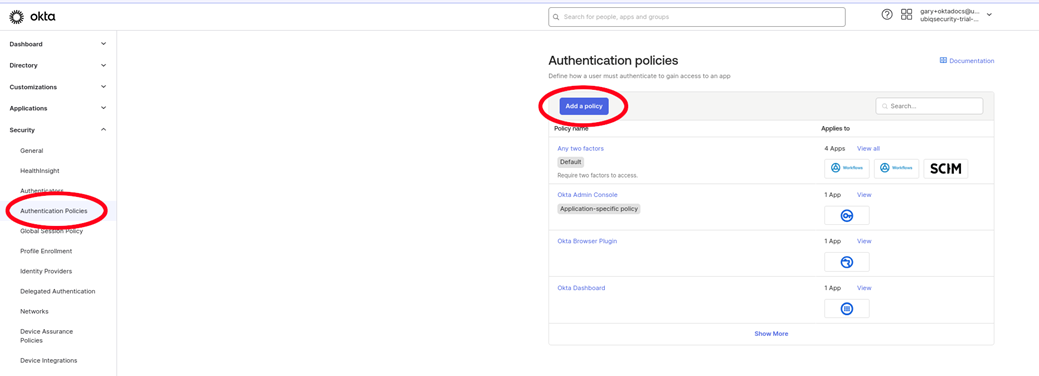
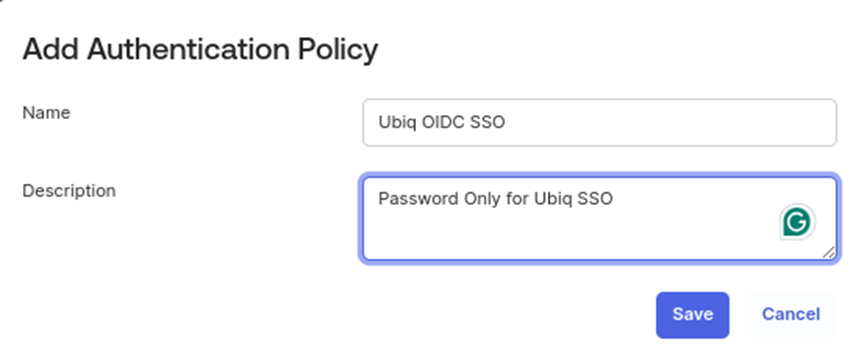
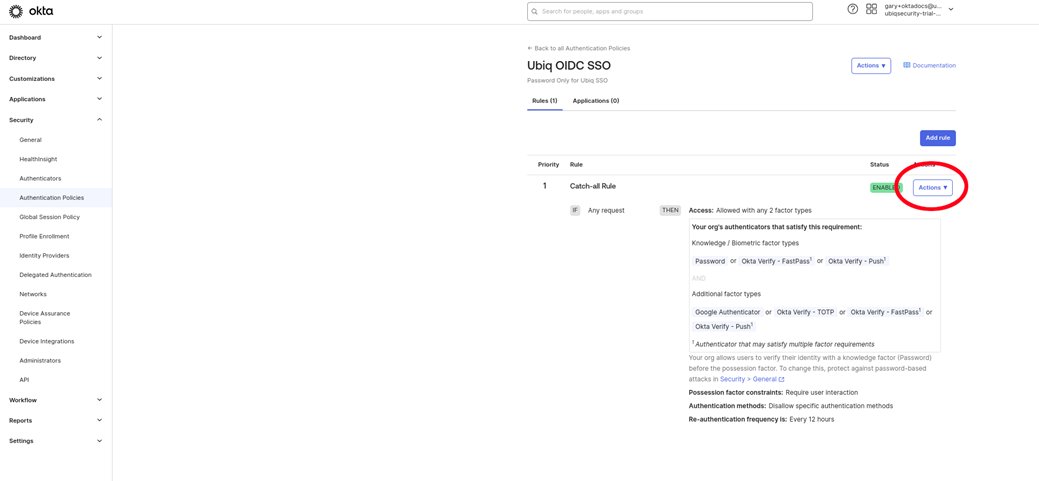
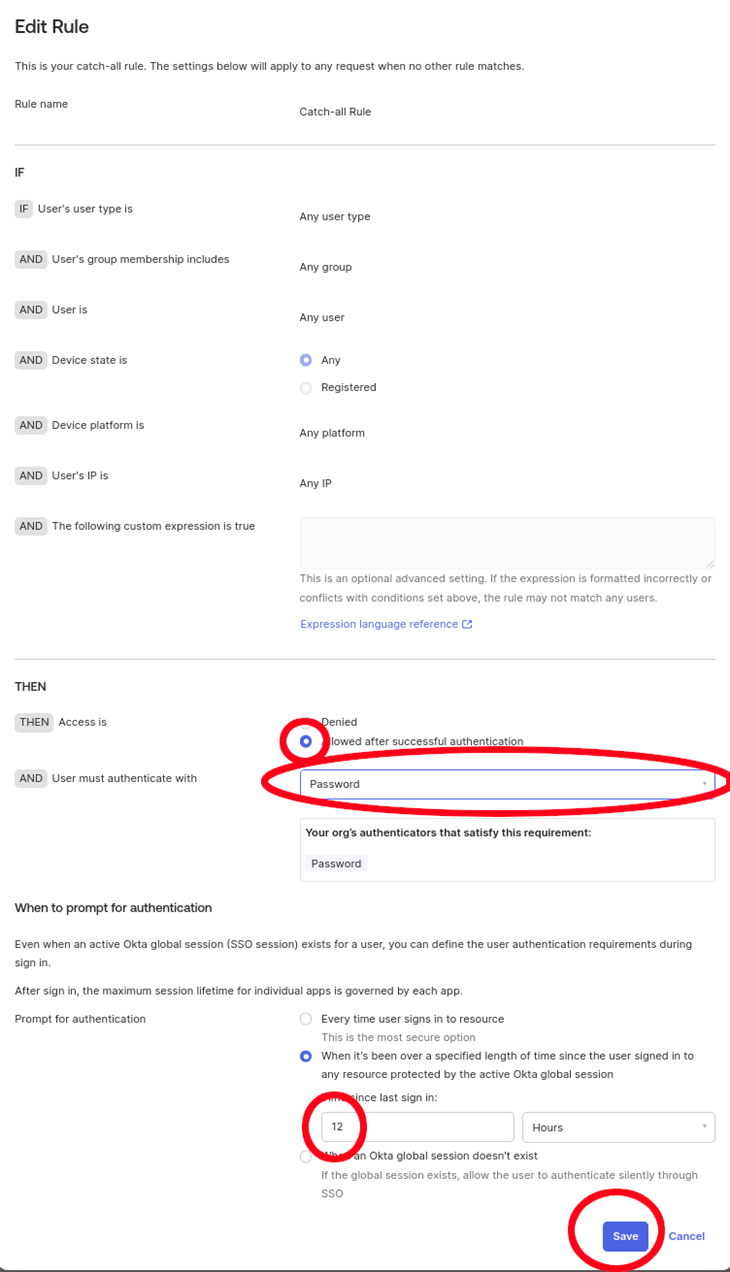
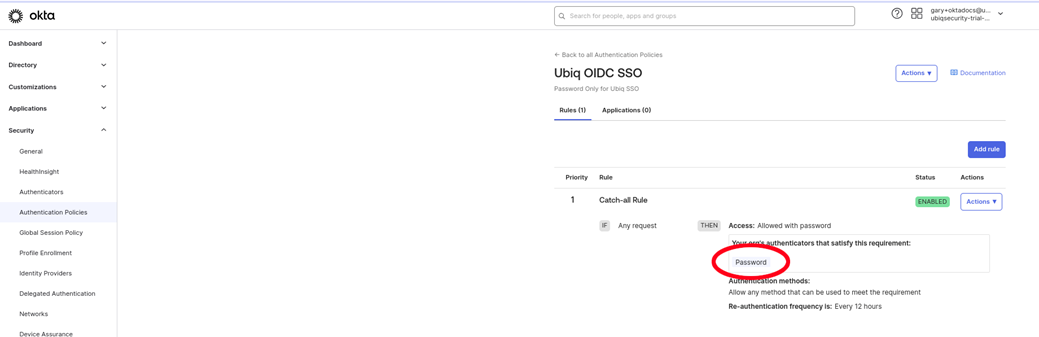
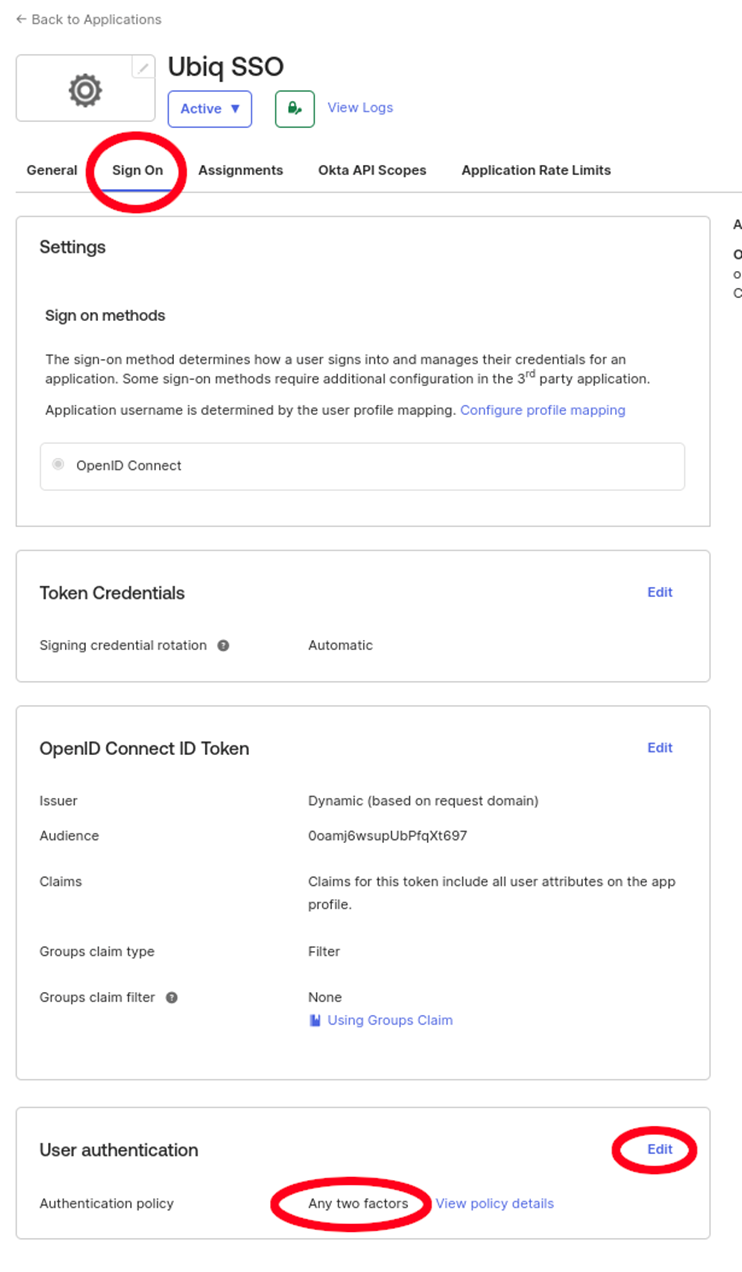
Create a new Password Authentication Policy
-
Set the password Authentication Policy to the OIDC application
-
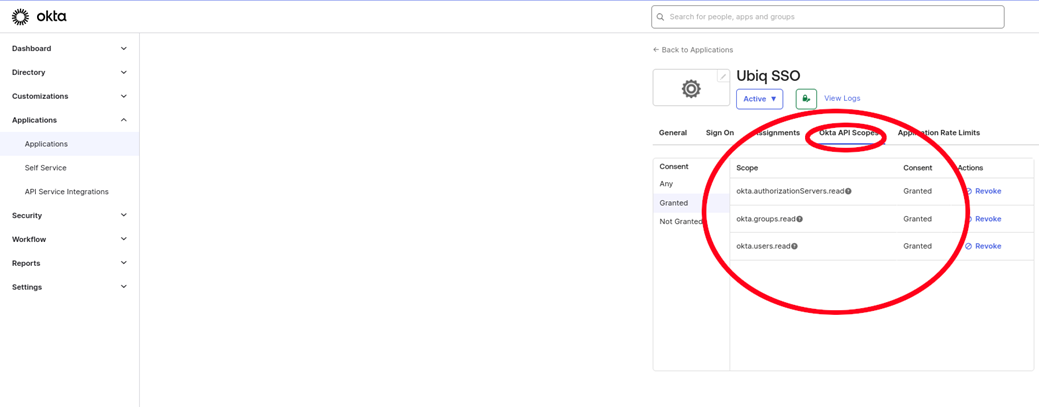
Grant Okta API Scopes
-
Enter the OpenID Connect Discovery URL, the IDP Token Issuer, and the IDP Token Audience into the Ubiq IDP Settings window (see the SCIM Setup -> SCIM Parameters from Ubiq section on instructions for how to get to the Ubiq IDP configuration modal)
Use Okta credentials in Ubiq library/SDK
See library/SDK dev docs for specific implementation examples. General setup will include:
Ubiq configuration file settings for the IDP
- The customer_id is from Ubiq SCIM URL in the IDP Settings window.
- The tenant_id value is from the Client ID field in the General tab when creating the OIDC Application.
- The client_secret value is from the CLIENT SECRETS portion of the General tab when creating the OIDC Application
- The token_endpoint_url is from the Okta account. The oath2/v1/token is consistent.
"idp": {
  "type": "okta",
  "customer_id": "6e7e795e-26a2-4973-aa73-b9fc259ebc5f",
  "token_endpoint_url": "<https://trial-4377979.okta.com/oauth2/v1/token">,
  "tenant_id": "0oamj6wsupUbPfqXt697",
  "client_secret": "iKrc\<…...>Ol6"
}.
Ubiq Credential settings
- SERVER will always be https://api.ubiqsecurity.com
- IDP_USERNAME will be the name of the user within Okta
- IDP_PASSWORD will be the user’s Okta password
[idp]
SERVER=<https://api.ubiqsecurity.com>
IDP_USERNAME=<okta-username>
IDP_PASSWORD=<okta-password>
Updated 17 days ago