

Self-Signed Identity Authentication
Authenticate SDK requests using Ubiq-issued self-signed credentials when an external identity provider such as Entra ID or Okta is not used.
Self-Signed IDP Integration
Self-signed identity authentication lets applications authenticate to Ubiq using a Ubiq-issued key pair instead of integrating with an external identity provider such as Entra ID or Okta.
In this model, the Ubiq dashboard generates a public/private key pair. You securely store the private key in your application environment, and the SDK uses it to sign short-lived JWTs locally. Ubiq verifies those JWTs against the matching public key and maps the runtime identity to the appropriate Ubiq Identity and Access Groups.
Use this authentication model when:
- You do not have an Entra ID or Okta tenant available for this integration
- You do not want an external IdP in the runtime authentication path
- Your application already has its own identity model, such as database users, service accounts, internal application users, or embedded extensions
- You need to map application-level or service-level identities to Ubiq dataset access policies
How self-signed authentication differs from Entra ID or Okta
Self-signed authentication is configured from the IDP Integration section of the Ubiq dashboard. This option is available to enterprise plan users.
Self-signed setup is a single-part flow rather than the two-part SCIM + OIDC flow used by Entra and Okta:
- Configuration of a new keypair on the Ubiq dashboard that the platform will use to verify your SDK's locally-signed JWTs
- Manual creation of API keys whose names match the identities your application will present to the SDK
There is no SCIM synchronization in self-signed mode — Ubiq does not pull users or groups from any external system. Each identity your application uses must have a corresponding API key created manually (or via Ubiq's admin API) before the SDK can authenticate as that identity.
Auto-provisioning
Self-signed mode does not auto-provision Identities. There is no external IDP to synchronize from. You can use a custom SCIM source to push identities to Ubiq for use with a self-signed IDP integration, however, the canonical identity of the source identity (usually the email address) must match the identity provided in the IDP at runtime. This will also be used as the identity name in the Ubiq UI. If you instead manually create identities, the matching rule also applies.
Configure self-signed authentication in the Ubiq dashboard
Enable self-signed authentication
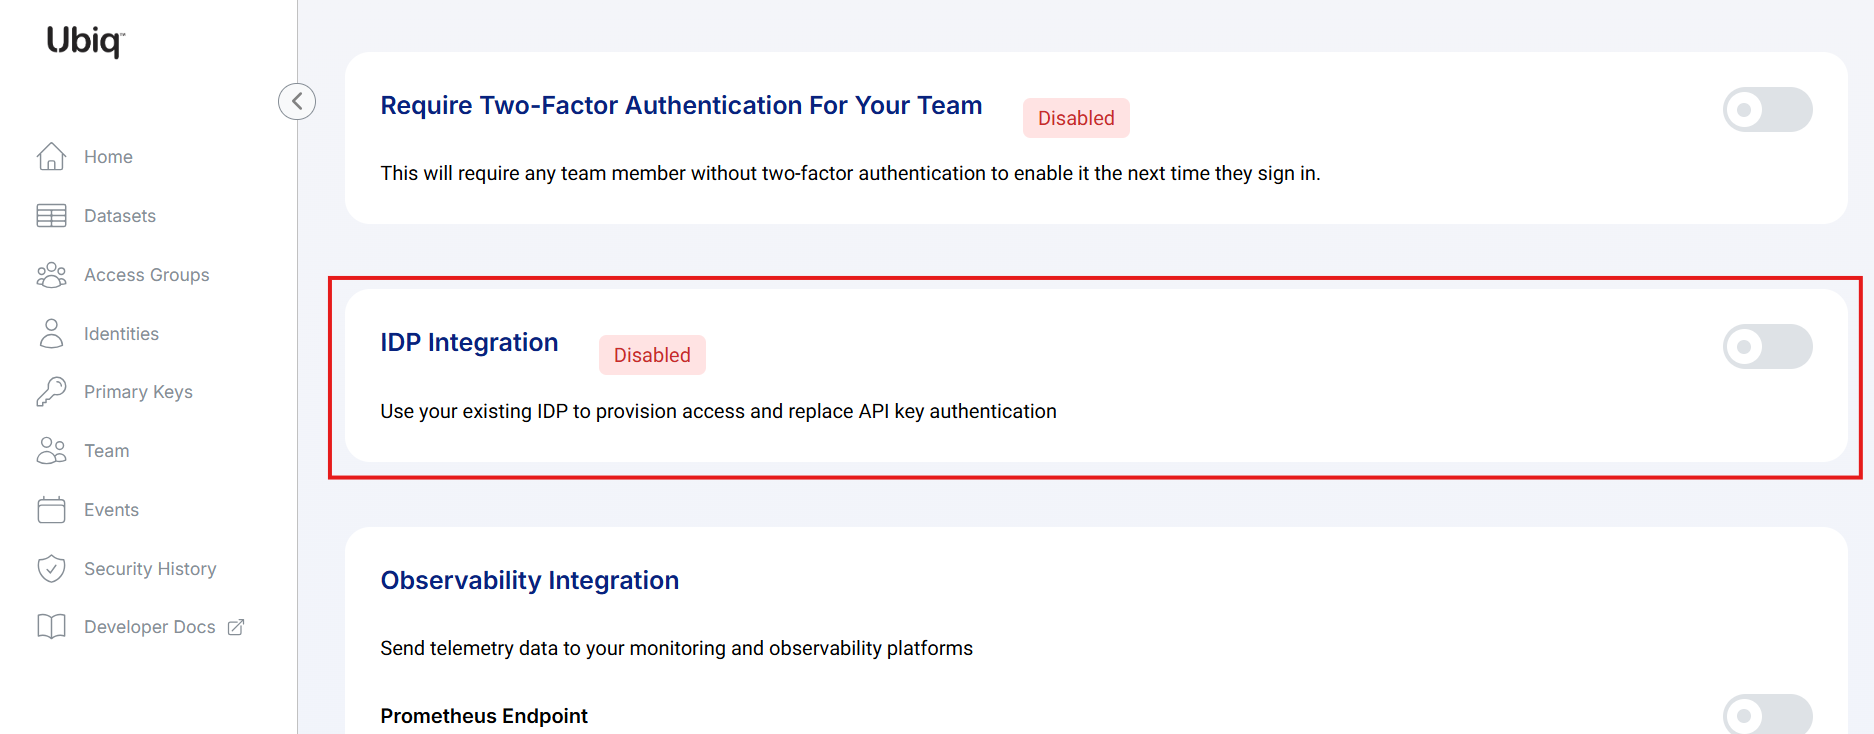
Select Self-Signed as the provider.
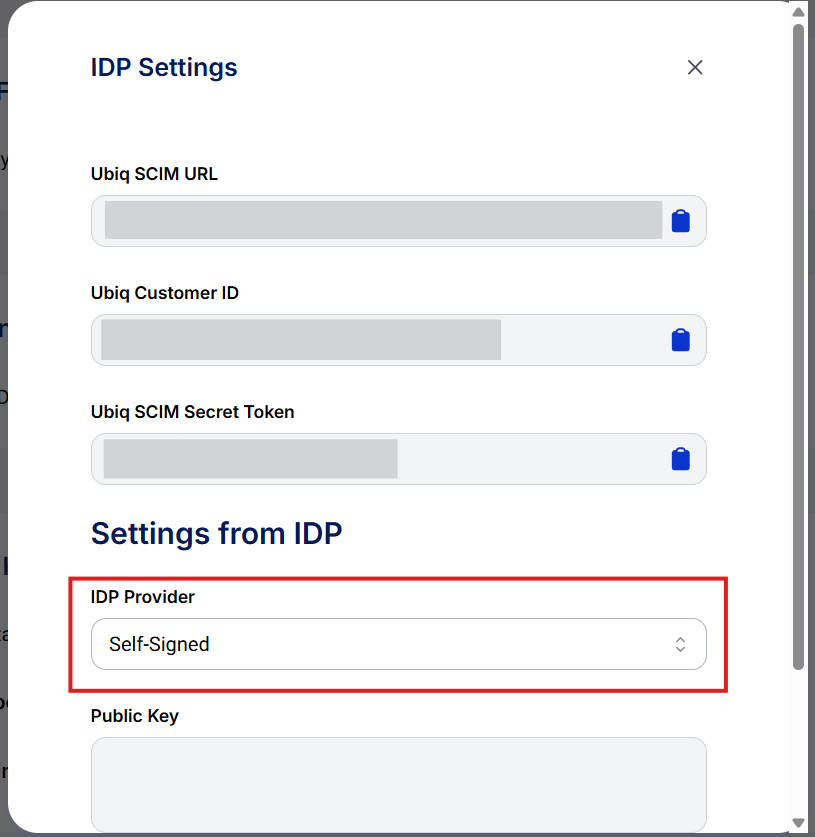
In the next step, you'll Generate a key pair, so if you do that here, make sure to copy the private key as well as the Ubiq Customer ID for the next step
Self-Signed Setup
Step by Step Instructions for Self-Signed Setup
In this example we'll set up a self-signed IDP integration for two identities: [email protected] and [email protected]. The same pattern scales to any number of identities — create one API key per identity.
Generate the key pair
- Navigate to Account Profile → IDP Integration on the Ubiq dashboard (Account button on the bottom left → IDP Integration button)
- Select Self-Signed in the IDP Provider dropdown
- Click Generate Key Pair
- When the private key is shown, click Copy to Clipboard and save it to a secure location, such as an approved secret-management system. This is the only time the private key is displayed. Do not commit it to source control or share it in tickets, chat, or email.
- Note the Ubiq Customer ID value shown in the same panel (e.g.
1e2e2e2e-2e3e3e3e-4fff-abcdefg123456fff). The UUID segment is yourubiq_customer_idfor the SDK configuration below. - Click Save. This step is required — it persists the public key on the dashboard. Without it the SDK's locally-signed JWTs will fail verification at the backend with a generic "Not authorized" response.
Create Ubiq Identities for each runtime identity
For each identity your application will authenticate as, create an API key on the Ubiq dashboard with the identity as the Name field. The Name field is case-sensitive and is what the backend matches against the SDK's JWT identity claim.
- Navigate to Identities in the dashboard
- Click Create Identity
- In the Name field, enter the identity exactly as your application will present it (
[email protected],sql_login_42,inventory-service, etc.) - Assign the Identity to the Access Groups it should have access to
- Click Save
- Repeat for each identity
Identity-level access control: Each Identity controls which datasets that identity can use. Two identities created under the same self-signed integration can have completely different dataset access — assign datasets to each Identity independently.
Use Self-Signed credentials in Ubiq library/SDK
See library/SDK dev docs for specific implementation examples. General setup will include:
Ubiq configuration file settings for the IDP
providermust be"ubiq"— this is what selects self-signed mode (vsoktaorentra)ubiq_customer_idis the UUID segment of the Ubiq SCIM URL captured in step 5 aboveself_sign_keyis the private key PEM captured in step 4 above. Because JSON does not allow literal newlines inside string values, the PEM must be embedded with\nescape sequences in place of real newlines. The simplest way to produce a JSON-safe form from a PEM file isjq -Rs . < private_key.pem.
"idp": {
  "provider": "ubiq",
  "ubiq_customer_id": "1e2e2e2e-2e3e3e3e-4fff-abcdefg123456fff",
  "self_sign_key": "-----BEGIN RSA PRIVATE KEY-----\nMIIJKQIBAAKCAgEA…<base64 body with \\n between lines>…\n-----END RSA PRIVATE KEY-----\n"
}
Credential settings
Credential file (single user, infrequent user switching)
SERVERis alwayshttps://api.ubiqsecurity.comIDP_USERNAMEis the identity to present — must exactly match the Name of an Identity created in the previous section- No
IDP_PASSWORDis needed in self-signed mode. The SDK signs JWTs locally usingidp.self_sign_key; there is no IDP credentials check.
[idp]
SERVER=https://api.ubiqsecurity.com
[email protected]
Runtime user context switching (multi-user, frequent user switching)
The method naming and signatures may differ by language; refer to your language / SDK documentation for specific examples. In concept, this mode is best suited for applications that wish to identify the running-user context to Ubiq and use the user identity for authorization. Instead of defining the user in a configuration file, the username will be set at runtime using:
credentials = new Ubiq\Credentials();
credentials->setIdpUsername('username');
How it works under the hood
The SDK does the following on the first encrypt or decrypt call:
- Generates a random local RSA keypair and a PKCS#10 Certificate Signing Request (CSR)
- Signs a short-lived (10-minute) RS256 JWT locally using
idp.self_sign_keyfrom your config, with thesubandemailclaims set to yourIDP_USERNAMEvalue - POSTs
{"csr": "...", "self_signed": true}tohttps://api.ubiqsecurity.com/<ubiq_customer_id>/api/v3/scim/ssowith the JWT in theAuthorization: Bearerheader - The Ubiq backend:
- Verifies the JWT signature against the public key stored on the dashboard (matching the keypair you generated in step 3 above)
- Looks up an API key whose Name matches the JWT's
emailclaim - Returns short-lived
public_value+signing_valuecredentials plus anapi_certsigned against the SDK's CSR
- The SDK uses the returned credentials for all subsequent encrypt/decrypt API calls, threading the
api_certinto key requests so the backend can wrap data keys to the SDK's locally-generated RSA public key
The flow is transparent — the SDK exposes the same API surface as standard Ubiq credentials. You pass the resulting credentials object straight to Ubiq.encrypt / Ubiq.decrypt (PHP) or UbiqEncrypt.encrypt / UbiqDecrypt.decrypt (.NET / Java / Go / Node) and nothing else changes.
Common pitfalls
401 Not authorizedfrom the SSO endpoint with no specific detail. The most common cause is forgetting to click Save on the dashboard after Generate Key Pair — the dashboard keeps the previously-saved public key, and your new private key won't verify. Re-do steps 3–6 above and confirm the Save button completed without error.401 Not authorized, public key matches, still failing. TheIDP_USERNAMEvalue doesn't exactly match an API key's Name (case-sensitive, whitespace-sensitive). Verify in the dashboard's API Keys panel.- JSON parse error when loading the config file. The
self_sign_keyPEM contains newlines that aren't escaped to\n. Usejq -Rs . < private_key.pemto produce a JSON-safe string, then paste the output (including the surrounding quotes) as the field value. - Private key was lost and cannot be retrieved. The dashboard does not store the private key — only its public counterpart. Click Generate Key Pair again, copy the new private key, click Save, and update every deployment with the new key. The old key becomes unusable the moment Save is clicked.
Updated 21 days ago